Wednesday, June 29, 2011

Beginners Guide to Dropbox

Dropbox is a service I would recommend to anyone who had the time to listen. Unfortunately, not many people enjoy discussing favorite software and services so I'll just have to settle for posting my thoughts right here.

So what is dropbox? - I originally installed dropbox as a solution for keeping my school documents synced across multiple computers. But after being a loyal user for a few years now, I realize the powers of dropbox reach far beyond this. Dropbox is the single most easy, robust, and most importantly free back up service I know of. It mirrors your files online so that if anything happens to your computer, your files are still safe in the cloud.

How does it work? - This is by far my favorite thing about dropbox. All you do is install dropbox, and designate which folders you want it to watch. And thats it! Any files created, altered, copied or dragged into your designated dropbox folders are now instantly backed up online. You now have instant, hassle free back up.

What else can I do? - The bread and butter of dropbox is the cloud syncing. But now that your files are online, you've got access to some really nice features.

recover previous versions of any file – dropbox keeps track of every version of every file that gets synced (up to 30 days in the free version). This means that you can roll back any school paper or photoshop file to any previous version you want.


share photos – any folder created within the default photo folder of dropbox creates a new photo gallery. Just drop your photos in here and anyone can view your new gallery just by sharing the public link with them.


share any other file – just like the default photo folder, any file in your shared folder gets a public link you can share as well. This feature has saved me more than once with files to large, or code snippets that aren't accepted as email attachments.

Easy Ways to Get More Free Space – the free account for dropbox comes with only 2 gigabytes of online storage. But you can easily get up to about 13 gigabytes for free by completing some simple tasks, and referring some friends.


1.  Once you sign up for your free account, just click on the getting started tab and complete some easy tasks like taking the tour for up to 250 MB of free space.

2.  The next stop is dropbox.com/free where you can score up to 1.25 GB for completing tasks like following dropbox on twitter or facebook. 

3.  Although things get a little tougher at this point the rewards are well worth it. You get 250 MB for each friend you refer and sign up to dropbox, and 500 MB for each referal using a .edu address.

4.  About once a year, dropbox holds a dropquest, a online scavenger hunt that awards everyone with up to 1 GB just for participating.

5.  And last but not least, yes there are easter eggs. Through the year dropbox will give out various amounts of free space on different holidays or special events so keep an eye out for these.

So thats it for the basics of Dropbox. If you're an advanced user, you can try out some of these creative and interesting hacks to get some additional use out of dropbox. Maximum PC has a nice list of 15 dropbox hacks, Lifehacker has it's own list of clever ways to use dropbox, and Ars Technica has a specialty list for dropbox users on a Mac.

Monday, June 27, 2011

Why Nobody Wants My Advice

Not too long ago, I asked my parents for my first keyboard as a graduation present. I've always wanted to learn the piano but don't know anything about shopping for a keyboard. I had been trying to research this topic online the night before but was quickly overwhelmed with all the online advice I found. This incident quickly reminded me of how my own advice giving technique has evolved over the years.

When people come to me for tech advice, the answer I have in my head is usually a combination of complex algorithms and calculations. This is because my advice is usually about something I'm very enthusiastic about. For example, people in my family often come to me for advice when looking for a new computer. The problem is that I'm aware of so many different brands, models, pros and cons of different spec combinations, special features, advantages offered from all the different distributors, return policies and protection plans, or even options for upgrading current hardware. I could write an entire Thesis about all the available options. But no one wants to hear any of this, they would be overwhelmed and frustrated just like I was when shopping around for my keyboard.

Today my approach is much simpler. I still have the same thoughts swirling around in my head, but I now try to limit myself to only two questions. What is the budget, and what will it be used for. I make assumptions about all the rest and give only one or two choices for them to choose from.

Lesson Learned: Some people, including myself, just don't want to hear all the options. They would much rather have a clear specific action that they can take. Even now, I remember how relieved I felt when I got to the first local music shop and told the salesman that I was just a beginner looking for a first keyboard to learn on. He new exactly what to recommend and it made everything much easier than I had made it out to be. Lesson learned!

Thursday, June 23, 2011

Fantasy Box Office

In my junior year of college, a bunch of friends and I started a fantasy football league together. We've all had so much fun in this league that we've continued it every year since. The only downside to this league is that it excludes all of my friends who don't follow football on a level that allows them to compete in the league. This is why I was so excited when my favorite fantasy podcast started describing a game that would bring all the fantasy goodness to a more general audience. The game is called Fantasy Box Office.

The basic goal of Fantasy Box Office is to draft a list of 10 movies that will out earn all of your competitors lists in total box office earnings. Here are the official rules I've played around with and settled on after listening to some different ideas from the podcast:

1. Decide on the length of the season – I'm going to go with Independence Day (July 4) to Labor Day (September 5) since this time block holds a lot of great Summer releases. But you can shorten or extend the season to suit your needs.

2. Draft your roster – Use a site like comingsoon.net to help you create a list of 10 movies you think will make the most money during your season. To make things more interesting, you can enforce a rule excluding all sequels and prequels, eliminating easy choices like X-Men, Harry Potter, or Transformers.

3. Put your list in order – Put your list in order by what you think will be the biggest earners to the smallest earners. At the end of the season, you get a 5 Million Dollar bonus for any movie that you put in the correct order.

4. Track the results – Have the biggest geek of your group gather everyone's movie list and post them on the internet where everyone can see. Then once a week or so, use a site like boxofficemojo.com to track and update the box office earnings of everyone's list.

5. Crown the winner – At the end of your season, add up the total box office earnings of your list including any bonuses. The roster with the highest earnings is declared the winner!

So that's it for the basic “easy” version of the game. If you're a big movie buff, you can increase the difficulty by replacing your movie list with an auction style draft, or introducing additional point systems such as durability, and rankings. Rules for this style can be found here.

Tuesday, June 21, 2011

Travel Spending Do's and Don'ts

This nice gadget shopping guide over at The Technium inspired these rules of thumb for household purchases at The Simple Dollar. Since I'm still fresh off my trip, here is my list of vacation spending tips:

Do pay for location – One of our best decisions of the entire trip was deciding to pay a little extra to stay in downtown during our time in Chicago. We had originally planned to stay outside the city and just catch the bus into downtown until one of our friends who lived in the area convinced us that it was worth the extra cash to stay downtown. Being in the middle of all the action allowed us to easily catch a little breather back at the hotel between our day activities and night life. We didn't have to worry about catching the last bus out of town, and it was nice to be able to walk outside and find something to eat at any time of the day or night.

Don't pay for tours – This doesn't include specialty tours like say a tour of a baseball park where they bring you on the field, in the press and luxury boxes, and even in the club house. When I say don't pay for tours, I mean don't pay for someone to take you around to see the Empire State Building, Central Park, and Statue of Liberty while you're in New York. You can research all the hotspots of your destination before hand and check it out yourself. You will find time and time again that you're spending unexpected amounts of time at places you wouldn't have thought were that interesting. Something you don't have the freedom to do on a scheduled tour. One of my experiences with this was an impromptu rock skipping contest a friend sucked me into while checking out the Mississippi River (I won two orange juices).

Don't pay for a travel guide – We ended up throwing out the travel guide when we followed some bad advice it gave us in Harlem. Instead we relied on yelp for our dining choices, which has a much wider range of places to choose from anyway, and we relied on our previous research of the city to find things to do during the day. For the second time in this post, the value of great planning and researching your destinations is priceless.

Do bring plenty of cash – The most annoying repeating charge I ran into was ATM fees. I brought about $150 in cash thinking that would be plenty for a three week road trip. Many of the restaurants we stopped by during long driving stretches were in the middle of nowhere and accepted cash only. The restaurants that did accept credit card would often put our entire table on one tab, forcing us to split it using cash. Add in the public transportation cost, parking, and hotel tips in the bigger cities and we were all out of cash within the first week

Do risk it all – risking it all became our motto on this trip. It didn't always work. We ended up wasting money and time trying to get into the Jimmy Fallon Show, and ball park tour in D.C. But most times it was well worth it. In Boston we risked buying front row seats for a Red Sox game that had an extremely high chance of raining out again just like the night before. It turned out to be a great game, we got a ball from one of the home team players, and it turned out to be one of the best experiences of the trip. As a rule of thumb, I would say if you have a chance at a lifetime experience, it's worth the small risk of some wasted time or money.   

Saturday, June 18, 2011

Stack Exchange (staying in touch)

I was listening to the Baseball Today podcast from ESPN when Eric Karabell described what he called a stack exchange.  The basic idea is that Eric will keep a stack of his favorite articles he uncovers throughout the week.  This stack of articles contains mostly interesting takes on player performance and comparisons, with maybe a bold prediction or two thrown in.  At the end of the week, he'll send this stack of articles to his buddy, and his buddy will send his own stack of articles back to Eric.  They'll both read each others articles and have something to talk about whenever they run into each other on the road.  I thought this was very cool, and after expanding on the idea a bit, I'm ready to start my very own stack exchange.

The purpose of having a stack exchange:

1.  The biggest reason pushing me to start a stack exchange is wanting to stay in touch with friends.  This is my 6th year in college now, most of my friends have graduated and scattered around the West Coast.  I love to hear about all the new adventures everyone is up to these days, but it's a little different not having those shared experiences and inside jokes like we used to.  Getting to read some of what everyone else is reading may allow me to feel a little more present in there lives. 

2.  I don't read Glamour Magazine, but I do enjoy an occasional article demystifying body language of the dating world, or an interesting poll breaking down the most popular places to meet people in my age group.  Having a stack exchange might be a convenient way to expose myself to some new and interesting worlds out there without having to do all the exploring on my own.

3.  My last reason for wanting to try this is that it's just so simple and so little effort compared to the amount of enjoyment I think I'll get out of it.  The only real two steps for doing a stack exchange are:

  -Create a mailing list with everyone who is participating in your stack exchange.
  -Every week, everyone in the exchange will forward 1-3 articles they find interesting.

Some fun suggestions to try out:

1. Number each stack exchange you make so that you can celebrate mini anniversaries.  For example you can have a group video chat on your 100th stack exchange and talk about what your favorite articles have been so far, or maybe have a little gift exchange for the 1000th.

2. Start conversation threads within your exchange.  After the first person sends out his articles, everyone else should send their own articles by replying to the first e-mail sent.  This keeps all the articles nicely organized by week which makes it easier to send comments and feedback articles.

3. Request articles! Maybe you heard something on the news about the new iPhone 5 but you don't know much about it.  You can just request your tech buddy to drop an article describing some cool new features or maybe a timetable for availability.

4.  Have a standard format for emails.  I'm going to try article title, followed by short description or note, followed by a link to the article.

And that's about it.  I'm starting my first stack exchange this weekend.  I'll try some of my own suggestions and experiment a little.  I'll try to update this post with any success or failure stories along with any tips I find useful.

Tuesday, June 14, 2011

Google Reader Reading Flow

After returning from vacation last week, one of my first priorities was emptying out my Google Reader. catching up on the 1000+ posts that built up over the past month would be intimidating without solid Google Reader technique, so I thought this would be a perfect time to share my best tips and tricks for speeding up the Reader process.

First step is to jump into your settings and organize your feeds into folders. I keep a folder for each category of blogs I follow including tech, productivity, sports, personal finance, forums I participate in, and a folder for my favorite blogs which I've named “Stars.”

Change a feeds folder with the 'Add to a folder' drop down menu
The next step in my system is to change the Google Readers default view to something a little more practical. Switching to list view displays the blog name, date, and article name on a single line, instead of the entire article shown in the expanded view.

Change to list view by clicking 'list' in the top right corner


Combining the list view with my favorite Google Reader keyboard shortcuts cut out extra minutes out of my reader time that can really add up.

Shift + P and Shift + N – use this shortcut to navigate between previous and next subscription feeds in your reader.

Shift + X – open and close folders with this shortcut.

Shift + O – once you've landed on the correct feed use this shortcut to open and view all posts from that feed.

P and N – use the 'p' and 'n' keys to navigate between articles in a post.

O – use the 'o' key to open the article into expanded mode so you can read the entire article. Press 'o' again to send the article back into list view.

M – if you navigate to an article that doesn't look interesting, use the 'm' key to mark that article as read.

V – use the 'v' key to open an article from the original blog it came from in a new browser tab.

CTRL + W – close the new browser tab and return to your reader with this shortcut.

S – use 's' to star an item for later reading.

G then S – hit 'g' then 's' to view all your starred items

These are all the shortcuts I need in my daily routine, but here is a link to the full set of keyboard shortcuts if you want to explore. And that's about it! It may not seem like much but I would estimate it shaves a full 10 minutes per day compared to scrolling through expanded posts with my mouse. One final tip for anyone stuck in a situation like mine. If you have thousands of posts to get through, I find it useful just going through all of it and starring items you want to check out instead of reading them. After emptying out your entire Reader this way, you can go back to your starred items with the 'g then s' shortcut.   

Friday, June 10, 2011

Vacation

First off, sorry for the lack of preparation leading to the long hiatus of this blog, but here are some pictures from my nice long vacation!

Fenway Park

casting our shadows on the Lincoln Memorial

the Mississippi River

our road trip route

Times Square

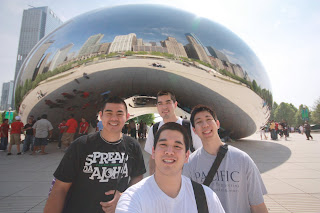
The Bean

St. Louis Arch

pit stop in the snow

largest complete T-Rex fossil in the world